Mission 008 Update – Where did I put that…
This month, for our Mission 008 Update, we have a guest post from Natetehagressar, who has been running a Szalamandra out of Nomads and Tunguska on and off for the past few months. He’s influenced much of my thinking on TAGs particularly with regards to positioning (hence this update’s title), so rather than try to parrot him and distort the message, here he is, talking about a recent game of Deadly Dance.
–WiseKensai
Mission Report: One Man’s Trash, SHOWDOWN!
WiseKensai was kind enough to host a showdown tournament this month since our regular tournament was cancelled for the Best of the Pacific Northwest event. In honor of this month’s Bromad Academy Deadly Dance was the mission selected, with the Soldiers of Fortune addition (so all factions could at least take a Merc tag)
The mission was slightly altered as well to make the assigned zones fairer. Instead of each player rolling their zone, player one rolled their zone, and player two automatically was assigned the zone catty corner to it. This is to prevent lopsided zone designations. (The mission really sucks when your zone is on your opponent’s side of the board, and their zone is on their side too).
I spent a great deal of time making different lists for the event. Because it is a showdown, you need to maximize your score over a single game. To win the tournament a TAG was pretty much mandatory as 3 of the 10 points are scored based off your tags performance.
Playing Tunguska that locked in a Salamander, as I didn’t want to pay an extra SWC to get a mopey merc TAG.
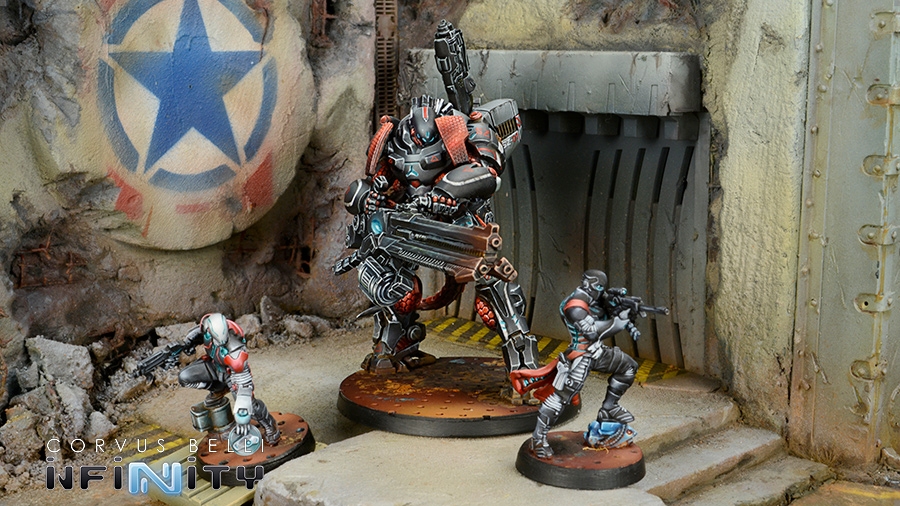
Next I narrowed down to a Securitate link. If I am already playing a sectorial, I have paid the opportunity cost for a CORE team, I may as well field one. I went through various iterations, some including a Grenzer sensor to aid in hunting things like Oniwaban who can make short work of your TAG. In the end I elected to take
natetehagressar
GROUP 1 |9
1
SECURITATE Lieutenant Combi Rifle / Pistol, Knife. (0 | 13)
SECURITATE Combi Rifle / Pistol, Knife. (0 | 13)
SECURITATE (Repeater) Boarding Shotgun / Pistol, Knife. (0 | 15)
SECURITATE HMG / Pistol, Knife. (1 | 21)
GRENZER Missile Launcher / Pistol, Breaker Pistol, Knife. (1.5 | 29)
GROUP 2 |
SZALAMANDRA Hyper-rapid Magnetic Cannon, Heavy Flamethrower / . (2 | 90)

SZALAMANDRA PILOT Contender / Pistol, Knife. ()
PUPPET MASTERS (Minelayer) Submachine Gun, Antipersonnel Mines / PistolKnife. (0.5 | 14)
MARY PROBLEMS Hacker (Forward Deployment L1) Submachine Gun + Zapper, Pitcher / Pistol, Knife. (0.5 | 30)
CLOCKMAKER Combi Rifle, D-Charges / Pistol, Knife. (0 | 18)
ZONDBOT Electric Pulse. (0 | 3)
SPECTOR (AD: Combat Jump) Boarding Shotgun, Nanopulser, Drop Bears / Pistol, E/M2 CC Weapon. (0 | 33)
1
HECKLER Boarding Shotgun, E/Marat / Pistol, Knife. (0 | 19)
5.5 SWC | 298 Points |Open in Infinity Army
The Puppetmaster mine layer was selected for its cheap order, and the additional security a mine in play could add if I were to go second.
Mary was selected, the KHD is a TAGs best friend, and I prefer no to rely on the Salamander’s pilot’s KHD, one bad roll and you’re out a huge investment. The AHD and her other tools are useful as well, she’s an excellent choice to camp the consoles in this mission.
A clock maker and a bot were added. Being able to heal or fix EM off the tag are useful for such a big investment. They also are expendable body blocks. If I were to be paired again JSA or similar I would deploy them in a manner to physically body block to reach the TAG. Hopefully forcing an Oni to reveal and get shot before it has the chance to mono CCW the TAG.
I added AD Raoul. I don’t run him frequently and his model just came out. I thought he would be good to take for a spin, and his EM2 CCW could really mess up a tag if he got to go first.
Finally the second combat group received a BS/EMarat Heckler, to deny area and top off my order pool after the inevitable casualties.
I got paired off against our very own Zagdag running Onyx. His list was something like this, I didn’t know what all was in hidden deployment (though I strongly suspected a Notifier ML…)
Editor’s Note: This was the actual list.
Zagdag
NEXUS Lieutenant (Specialist Operative) Combi Rifle / Pistol, Knife. (0 | 16)
OVERDRON 2 Heavy Rocket Launchers / . (2 | 57)

STALDRON Flash Pulse / Knife. (0 | 0)
UMBRA LEGATE K1 Combi Rifle, Flash Pulse / Pistol, DA CCW. (0 | 40)
UNIDRON Missile Launcher, Light Shotgun / Pistol, Electric Pulse. (1.5 | 20)
KERR-NAU (UPGRADE: White Noise) Plasma Rifle + Pitcher, D-Charges / Breaker Pistol, Knife. (0 | 27)
UNIDRON (Forward Observer) Plasma Carbine / Pistol, Electric Pulse. (0 | 15)
UNIDRON K1 Combi Rifle / Pistol, Electric Pulse. (0.5 | 16)
NOCTIFER Missile Launcher / Assault Pistol, Knife. (1.5 | 32)
MALIGNOS Hacker (EI Assault Hacking Device) Combi Rifle, Antipersonnel Mines / Pistol, Knife. (0.5 | 41)
MALIGNOS Boarding Shotgun, Antipersonnel Mines / Pistol, Knife. (0 | 34)
10 | 6 SWC | 298 Points | Open in Infinity Army
I won the WIP roll of and elected to go first, Zagdag picked the side with more cover and vantage points, and elected (wisely) to make me deploy first.
I deployed the securitate link mostly in total cover behind my central building, leaving the Grenzer out on ARO duty. (Since I was going first I was hoping to be able to leverage Sally to clear any multiple ARO entanglements).
Clockmaker went in with the link and a zond bot went on the far side of the board behind a rocky outcrop to keep my deployment options open. The puppeteer and Mary both went on my right as the taller buildings kept the lanes of fire shorter, hopefully letting them leverage their SMGs better.
Zagdag set up his unidron link mostly in total cover behind and inside the unpainted Comanche building. The notably exception being the ML standing on the stairs on the front of the building staring down my Grenzer. The Nexus was hiding in the second floor of that building. The Overdron was set behind the middle building facing forwards. Then Zagdag and WiseKensai shooed me away for hidden deployment.
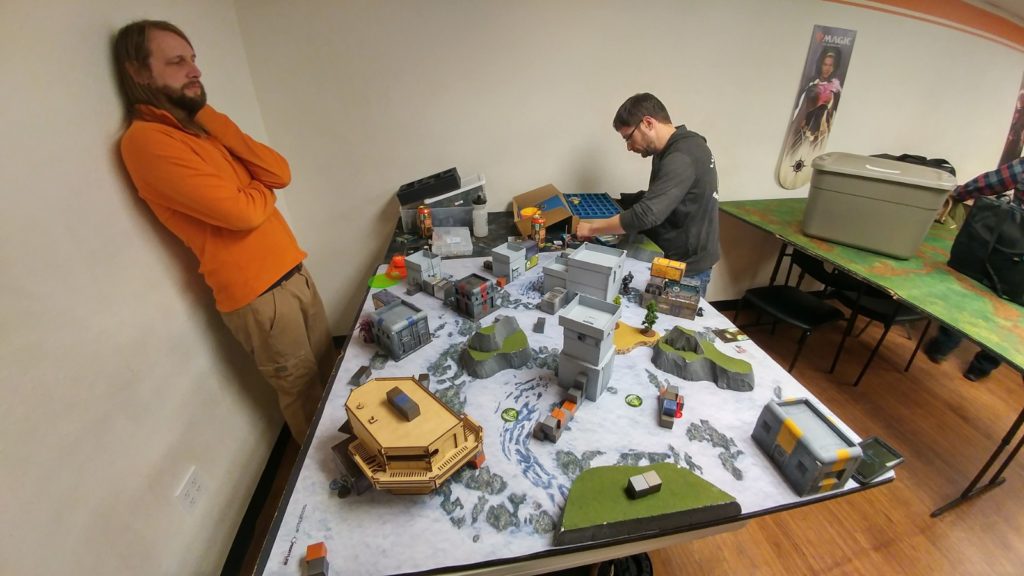
I spent a great deal of time thinking about where to deploy Sally. I thought about behind the rocky outcropping to shoot down the Unidrone ML from in cover. This location was good because of the helper bot, but risky because there was no total cover to retreat too. It was also a very open location and fear of at least one notifier ML made me hesitant to deploy there. I also considered using the forward deployment 1 granted by the mission and deploying in front of the rocks but with the tower directly between Sally and the ML, the plan being to close to under 24 inches, and engage from cover provided by the tower, while in a saturation zone. This would minimally compromise Sally’s numbers, while hurting the burst and target numbers for the unidrone substantially. Again I opted not to take that approach because it was so open from other angles, one or event two Noctifiiers at the wrong moment could spell disaster.
I ended up deploying near the securitate behind the tall building. This location had the advantages of significantly limiting LoF to the tag due to all the tall buildings. There was also a significant support base over there with a Grenzer, repeater, Mary (and her hacking zone) and a deployed mind all denying access to approaches to Sally. The whole area was a good place to retreat to before the turn ended.
Zagdag put another model in to hidden deployment. I elected Sally as my data tracker, and Zagdag elected his Nexus. We rolled for zones, I lucked out and the zone to my near right, with my Sally castle was selected as my zone, making the zone in front of the Comanche outpost Zagdag’s zone. Zagdag elected to doc me 1 order (thank you very much counterintelligence).
I want to take this moment to call out a fundamental principle of TAGs. Positioning them is incredibly important. For all their BTS, ARM, structure and weapons a single hit from the right weapon can end them, and you need to position your TAG and your other models to deny your opponent this opportunity. I had a models and equipment guarding where I wanted my Tag to operate from, Zagdag did not.
TJC Turn 1
Cue Raoul spector. First order I decided to AD Raoul directly behind the Overdone (represented by the Caskuda). Zagdag’s heart skipped a beat, as Raoul proceeded to bif his AD roll and go off the board, walking in on my board edge near my Sally castle.
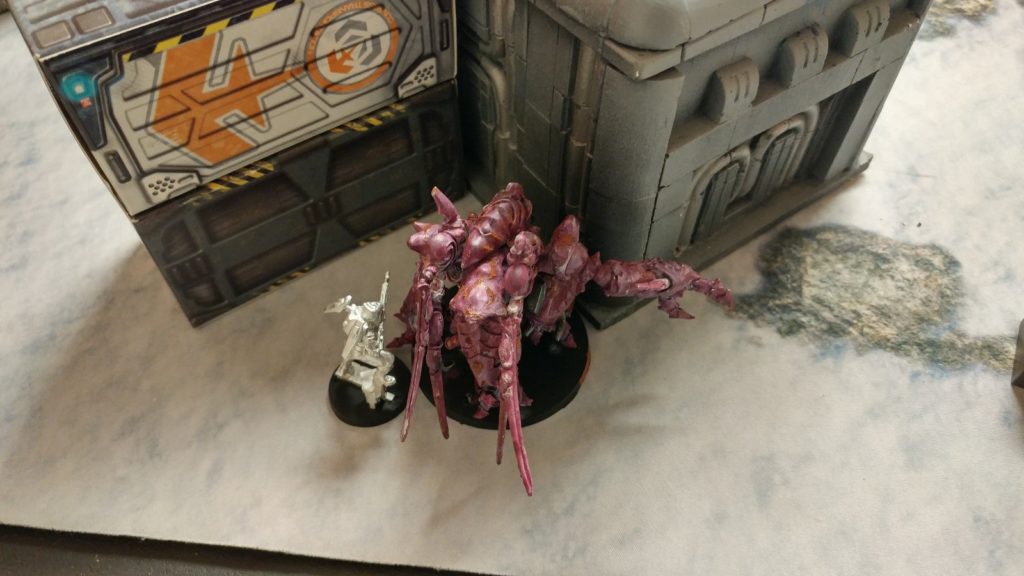
Planned 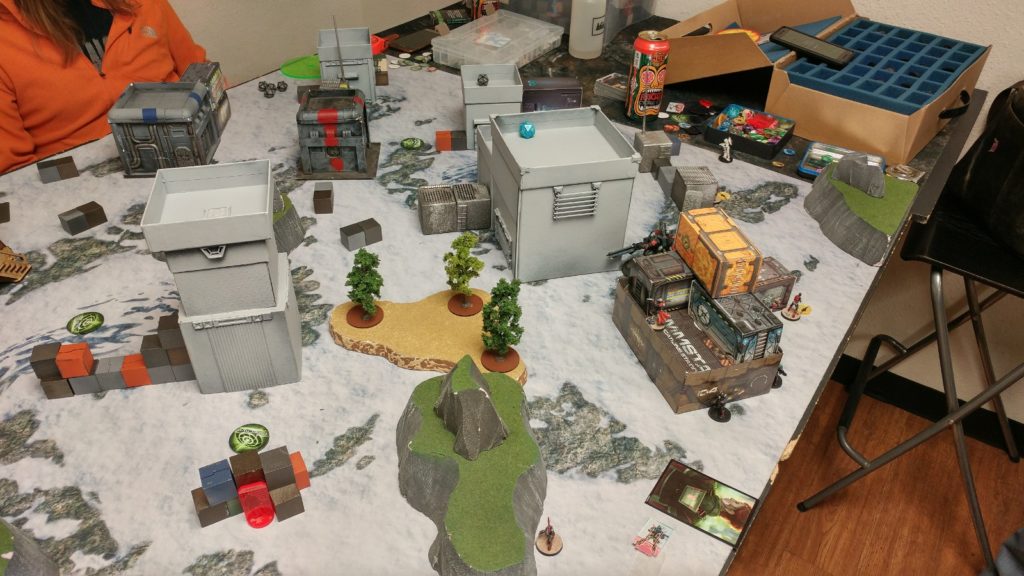
Actual
Order 2 Sally peeked out of total cover to shoot the Unidron ML and retreat back around the building into the scoring zone. Sally proceed to lose the face to face and take a wound, OUCH!
Not wanting to take that hit again I spend an order on the Link, making the Grenzer ML the leader. The Grenzer idled then shot the Unidron who returned fire. Between the cover, range saturation, and low vis the Grenzer had B1 on 16 and the Unidron was B1 on 11. Grenzer won and did a single wound, Zagdag elected to go dogged.
I didn’t feel comfortable trying my luck against the ML again so I decided to wait it out as I was already in my scoring zone. Mary ran up to a console. Sally and the Puppeteer went into suppression and Raoul ran up his board edge a ways to position himself to try for Zagdag’s Tag again
Onyx Turn 1
Zagdag broke a Malignos BS out of hidden deployment and dispatched Raoul, I tried to engage, in hindsight I probably should have dropped a bear. The Albedo on the Overdron protected it from casual AROs from the Grenzer, but if it elected to shoot the Grenzer sixth sense would give the Grenzer strong return fire. The Overdron advanced to behind the tall tower out of LoF to the Grenzer for when Albedo ran out.
Round end, we both scored 1 point for dominating our zone, and an additional point for using a Tag to do it. Mary successfully pressed the button and Zagdag’s zone rotated clockwise, moving to the other zone near his deployment zone.
TJC Turn 2
Start of my turn I move the Heckler (still in camo) into the main pool. He advanced out of LoF from the legate due to the tall stack of boxes towards the Overdron. A second order has him in the rear arc of the Overdrone. A TO camo appears to hold versus the Heckler. Heckler Emarats the Overdrone in the butt, and tanks a missle to the face from the Noctifier ML. The Overdrone goes IMM 2 and isolated.
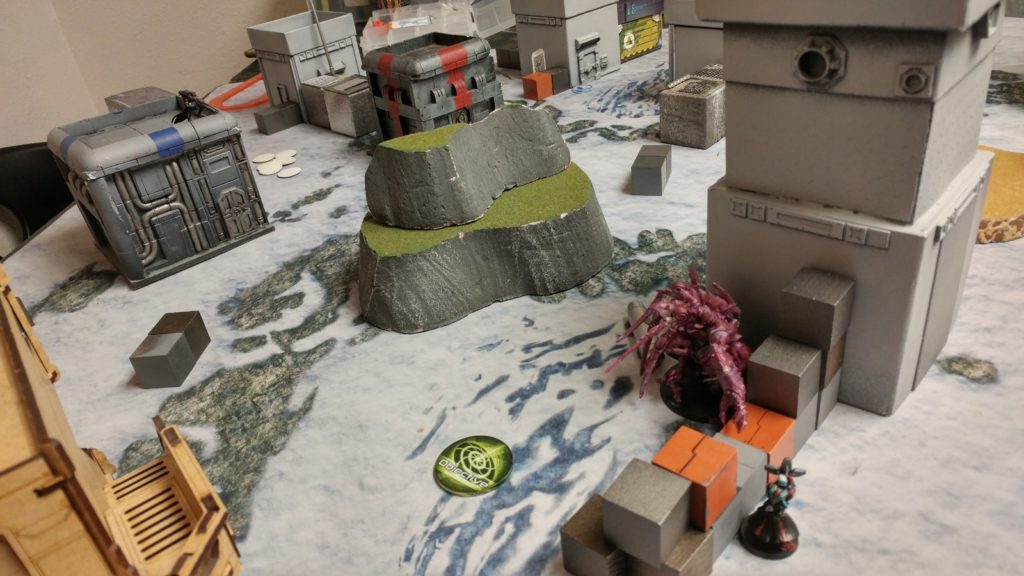
I think this is another good time to talk about positioning. At this point the Overdron was the lead model in Zagdag’s force. He had the Noctifier overwatching him, but no other models were not effectively deployed to watch approaches to his Tag. In this example the Heckler was able to essentially one shot Zagdag’s Tag because it wasn’t guarded sufficiently.
Sally walks back around the tall building and spends to orders putting the Overdrone into a null state and tries to kill a the Malignos BS. The Sally then retreats back into its castle, but is placed to watch a long lane going all the way to the comanche building diagonal across the board. Puppeteer moves forward and drops another mine to cover Sally.
Onyx Turn 2
Zagdag’s turn has a Malignos pop out of where the Overdron’s body is at. (In hidden deployment overlapping the body) who then proceeds to surprise attack the heckler. The heckler tanks a combi, and a round of shooting from the legates K1 before eventually succumbing to the weight of fire.
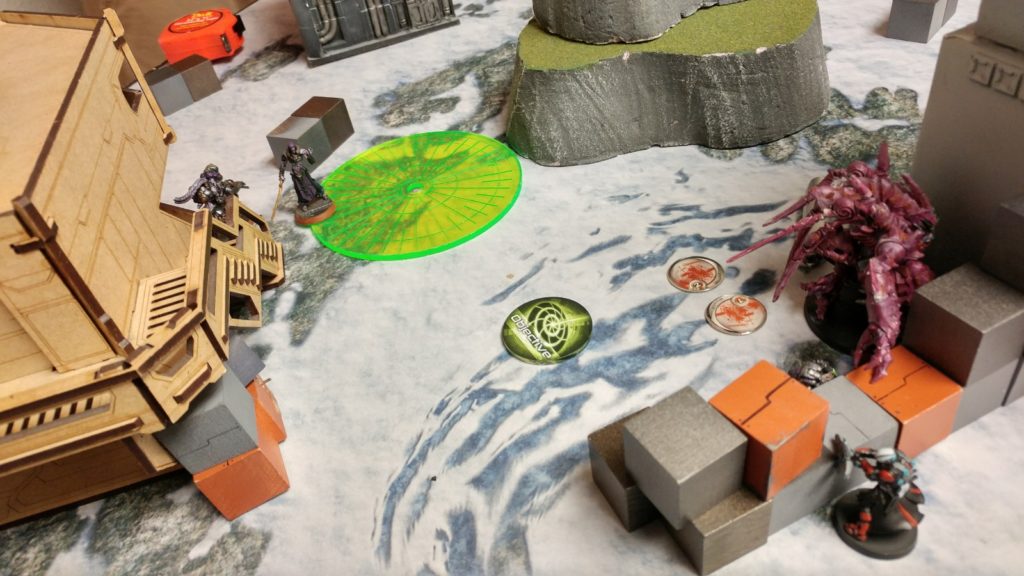
The unidron link remembers it has white noise and uses it to leap frog forward under the Grenzer until the Legate can get a long range shot off at 32” to the Sally. In the process the Legate suffers two AROs, one from the Sally and one from the puppeteer. Legate unloads on the sally and does a second wound, luckily the puppeteer shocks the Legate off the board. Low on orders and demoralized the unidrons retreat back into the comanche building and pass the turn.
End of round 2 sees Onxy score 2, one for the Maignos dominating the assigned zone, and a second for a completed classified. TJC gets 2, one for dominating the zone, and a second for Sally.
TJC Turn 3
TJC turn three sees Mary, the puppeteer and Sally work in tandem to flank the Boarding shotgun Malignos who is still alive and could easily kill Sally if left unchecked. Sally retreats back into total cover in her castle. Mary and the Puppeteer advance to cover approaches to Sally. Mary also manages to data scan a HVT in the process
Onyx Turn 3
Onyx doesn’t have enough orders to advance to where Sally can be engaged safely under white noise so they attempted a bonzai charge and ate missile launcher for their trouble.
Round 3 sees TJC score 4 points, 1 for the assigned quadrant, 1 for Sally, 1 for dominating more quadrants, and one for scanning the HVT
8-4 TJC win.
Lessons Learned
Tags have a lot of firepower, and are durable, but anything can and will die in this game. I think the keys to getting the most out of your Tag is to set your Tag up for success and to set reasonable expectations.
Arguable I think there were three major mistakes that game and they all revolved around poor Tag positioning.
During deployment and at end of round 1 I pointed out how the Overdron was unsupported. No tag can be expected to outshoot threats consistently during its reactive turn. (no Tag outside Maggie can watch its own back). Tags rely heavily on other elements to protect them outside active turn and Zagdag didn’t do a good job setting his tag up for success, both by failing to watch the Tag’s unprotected rear, and also by poorly positioning the Tag’s facing.
I also firmly believe that my positioning at the end of turn 2 with Sally watching the extended lane to the comanche outpost was a mistake. I severely underestimated the damage the legate’s K1 combi was likely to do even at that range. Fortunately I was saved by some luck and a puppeteer who was helping to cover the Sally.
I do not think that hiding your Tag in total cover is mandatory at the end of every turn, indeed part of their appeal is using the Tag;’s stats and weapons to control parts of the board. It is however necessary to assess the threats on the board, multiple linked K1 weapons, especially when paired with a good chassis such as a Legate requires a great deal of respect. At this point everything else in the list becomes expendible to protect your primary scoring asset, especially because I went all in and made my Tag the data tracker. The Tag was worth 5 objective points, 1 at the end of each round, and at this point 2 more for being the data tracker.
Protips
- Budget orders from your pool to retreat your Tag to somewhere safer.
- Create spaces where other models are helping to support your Tag, whether it is to watch its back to protect from AD, or to have mines and other equipment around to protect from other threats.
- Before the game starts assess the board for good locations to create your safe spaces, try to develop a plan for the mission that revolves around the location.
- When the Tag isn’t the answer to the problem, don’t be afraid to use other tools.
Thanks Nate! Good hunting, Bromads.
–WiseKensai

