Jhokalups – Field Operation Action Report – 46
Jhokalups – Field Operation Action Report – 46
Jurisdictional Command of Bakunin vs Jurisdictional Command of Tunguska
300/ITS 11 – Biotechvore
First game of the new year, we had a random roll for scenario this week and got Biotechvore. This will be good practice for Rose City Raid, and a good experience with a scenario I am not as familiar with. This was the first list I tried for the January Bromad Academy mission; which is about not relying on high burst weapons and more focusing on playing to the mission.
Wip Roll
Jurisdictional Command of Bakunin – 18
Jurisdictional Command of Tunguska – 3
Decision: Seshia
Deployment: Jhokalups
Initiative: Seshia
1st Turn: Jhokalups
1st Deploy: Seshia
Jurisdictional Command of Tunguska List:
Seshia Techvore
──────────────────────────────────────────────────
GROUP 1

 7
7
KRIZA BORAC Lieutenant HMG / Heavy Pistol, CC Weapon. (2 | 54)
SECURITATE Paramedic (MediKit) Combi Rifle / Pistol, Knife. (0 | 15)
SECURITATE (Repeater) Boarding Shotgun / Pistol, Knife. (0 | 15)
SECURITATE Combi Rifle / Pistol, Knife. (0 | 13)
SECURITATE Combi Rifle / Pistol, Knife. (0 | 13)
GRENZER Missile Launcher / Pistol, Breaker Pistol, Knife. (1.5 | 29)
HOLLOW MEN Spitfire, Chain-colt / Breaker Pistol, Knife. (2 | 36)


 5
5 

 6
6  1
1  1
1


 7
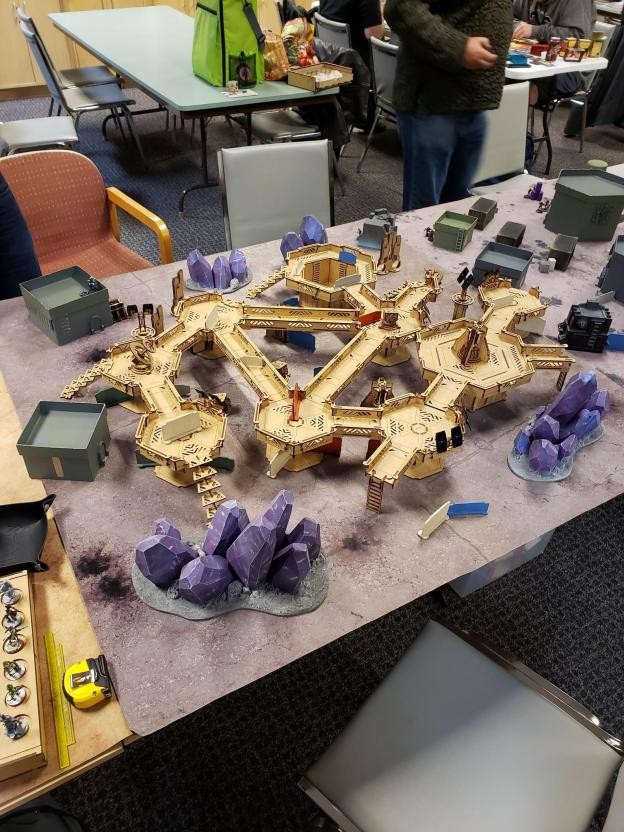
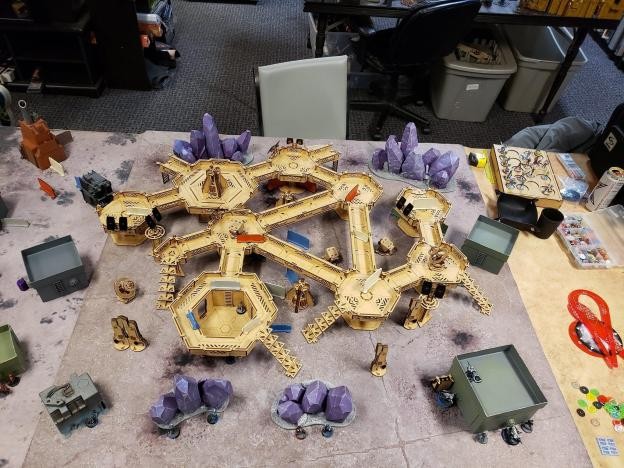
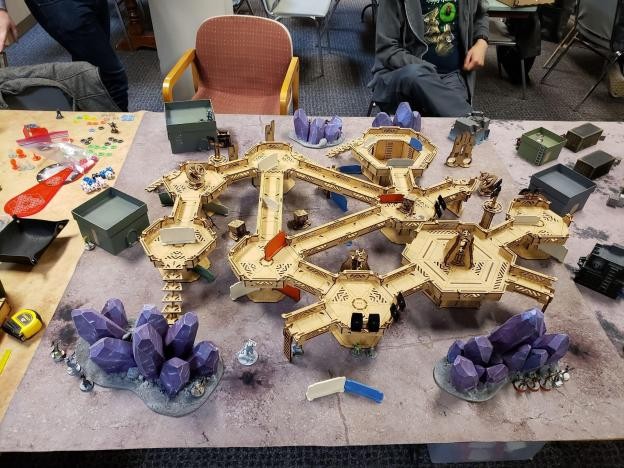
7 Our table was the catwalks with a lot of little walls blocking some of the cross table firelanes. The purple crystals at the board provided a good set of challenges for getting out of our deployment zones, but alsos good things to hide behind.

Deployment:
Seshia had a Securitate core on the left side. On the right the Perseus, Spector, Stemlpler haris was covered in overwatch by a hollow man. There was a Transductor zond, and Mary problems occupying the right side. There was a Kriza that was hiding on the left side.

I had 5 attempts to have models start outside my zone, my Reverend Haris and my two zeros. Out of the 5 confused deployment rolls, I only managed to pass one. So I set the Reverends up on my left ready to run up, and my Zero minelayer was near them. A thing I didn’t realize, is that since I didn’t over infiltrate my Zero, it would have stayed in a marker state, instead of being revealed. I had Zoe and Pi Well ready to move out of my zone as well. Since Seshia deployed null, I had my taskmaster deploy exposed. My Moderator core was on my right side, behind some crystals.

Top of 1: Jhokalups Bakunin
With my opponents mostly null deployment I have the freedom to run models up. There is a securitate not completely hidden that I hope I can get to. I have the Taskmaster coordinate with the Zero minelayer to bring them both out of the biotechvore zone. After hiding them I have the Moderators run up out of the zone and, mostly into cover. I manage to land a pitcher forward under some stairs to cover where the Kriza is. I then get Zoe and Pi-Well out of the zone. Lastly I bring my reverend haris forward I can get the Custodier into cover, but the healer and Kusanagi are only out of sight. Out of orders I end my turn.
Bottom of 1: Seshia Tunguska
To start things off, Seshia has their Hollowman stand up and walk over to take a shot at Kusanagi. The Hollow Man gets a crit and Kusanagi fails guts out of sight. The hollow man then jumps down and takes out my Taskmaster in a face to face. The Perseus, Spector, Stempler haris comes forward and lands drop bears covering my reverend Haris. I am able to get a couple shots on models as they walk by, but can’t hit anything. The Kriza comes forward with a lieutenant order and gets hacked through the repeater, unfortunately I cannot succeed my hacking rolls. After that the Securitate link team comes forward to take out a moderator, Pi-Well and the repeater. Out of orders Sesia ends their turn. The Hollow Man, a Transductor Zond, Mary Problems, and the Kriza all take Biotechvore rolls. The Hollow Man takes a wound, and the Transductor goes unconscious.
Top of 2: Jhokalups Bakunin
I need to clear out the dropbear that is covering my Reverends. I start by having my Zero minelayer trying to get a line on it. But have to clear the Hollow Man first. The hollow man crits the Zero. I spend some orders trying to spec fire grenades onto the securitate link, with no luck. I then try to have Kusanagi attempt to take out the Hollow man and Spector. I take out spector, and get a hit on the hollow man but it passes armor. I missed that the securitate could get a line on Kusanagi, and she goes down to a combi rifle crit. I then reveal my Zero KHD to try and take out both Drop Bears. I get the one covering my custodier, but lose the Zero to the Hollow Man. I try and have the custodier take out the stempler, but it passes its armor roll and rolls out of sight. After clearing the Stempler I complete my data scan classified against Perseus. I have a plan to slip the Custodier forward to take the remote out with hacking, forgetting about Mary, but passing the hacking exchange. As I try to get her out of the danger zone I lose her to Mary’s lightning.
At this point we call the game, I have Zoe, a Reverend Healer and 4 Moderators left.
With most of their army alive, and me completing the only classified, the game ends as a:
Final Score: 6 – 2 Tunguska Victory
Lessons Learned:
This game had me really frustrated, during the game I felt like I couldn’t pass a roll, and that my opponent couldn’t not pass a roll. My opponent said that they felt like I outplayed them, but our dice said no. After a bit of time I can see some areas for improvement.
One thing I could have done better was to manage my orders better. I over extended the Taskmaster and left a flank exposed. If I had it further back, I probably could have tucked my moderators completely away. I am not sure what I could have done better with group 1, but I would have liked to have the Reverends and Pi-Well fully in cover.
On my turn two, I got very focused on trying to clear out the mines on my left side. I am unsure if there would have been a different way to deal with the mines. I had a Morlock, but on turn two it went down against the Securitate. I would have liked to have used it to Chain rifle down the drop bears. Thinking back I am not sure on the distance, but I might have been able to drop the Reverend healer out of the link to take out the close drop bear.
The Bromad mission for January is about focusing on the mission, to force us to do that, we are asked to take no weapons with a native burst greater than 4. This list was my first pass at this, I found that on turn 1 I did really well of getting all of my models out of the biotechvore zone. One thing I didn’t do well, or got greedy about, was that I over spent orders on some units for the chance of being able to attack something out of cover. I overextended my Taskmaster, my Morlock, and this left my moderators, Pi-Well, and some of my Reverends out of position. In the future for Biotechvore (a scenario for Rose City Raid this year), I will need to focus on not just getting my models out of the Biotechvore zone, but also ensuring they are in a good position while out of the zone. The dice were not in my favor this game, there is no denying that. But I did not do myself any favors by having so many models in the open and out of cover.
Thank you Seshia for the game, and thank you for your patience with me. I am sorry for letting the dice get to me and not being able to provide an enjoyable game.
Until next time.
