Mission 024: Looting and Sabotaging
By Victor!
Overview
- Mission: Looting and Sabotaging
- Forces: Onyx versus JSA (300)
- Deploy First: Onyx
- First Turn: Onyx


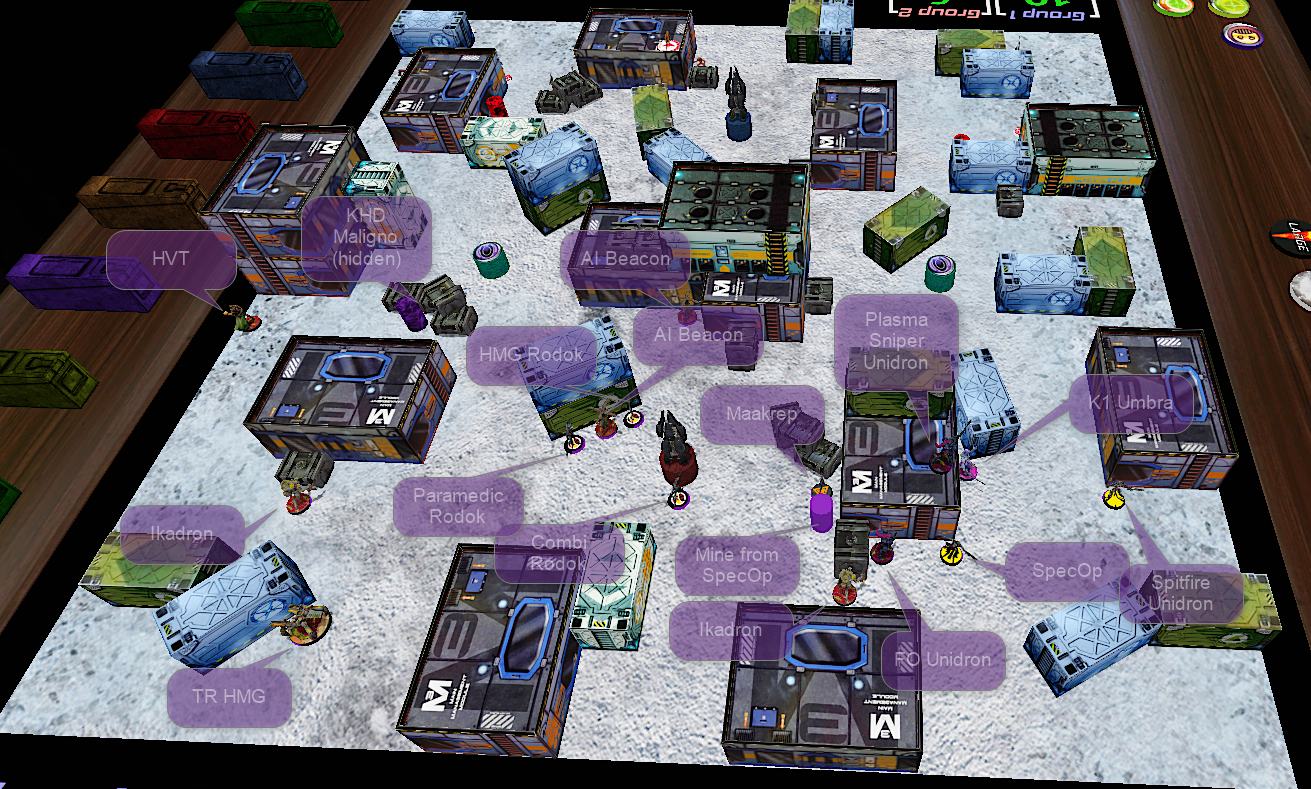
Deployment
Protect own AC: I place a Maakrep in order to prevent covering it with smoke, and a mine to discourage approach. Two Ikadrons can flash pulse someone who doesn’t approach with smoke or camo.
TR bot covers one panoply and another partially.
Maligno is there to place a Dazer and mine and block that access
Attack: Rodoks are quite centered, because they are covered by the central building and can move to a flank if required.
The unidron link will kill long range ARO with the sniper and then cover the fireteam advance

My opponent deployed a TR HMG next to a Keisotsu ML, and both were looking at the two main ways of approaching. One Ryuken minelayer covers each side of the deployment.
Another TR HMG is on the left, and I wonder which availability they have in JSA. I think he wants to run his right flank with the Rui Shi, taking advantage of Yojimbo’s smoke

Turn 1
Top of 1 – PlayerA
I move the Plasma Sniper and attack his TR HMG (we both forget about the other TR remote on my right). My opponent suspects he’s going to loose the FTF and tries to kill the spitfire unidron.
I completely remove the TR thanks to a crit and he deals one wound to the unidron.

Next thing is to break the fireteam, fix the unidron with the specops, give it marksmanship and reform the fireteam.
After that, firstly I climb down the ladder and kill his second TR HMG, which was really a Lu Duan (we realized it wasn’t possible because they have different Silouette values).
Secondly, feeling confident I want to kill the Keisotsu ML but he survives and hides.
I finish my turn moving Rodoks and placing a mine. I also reveal my maligno, getting FlashPulse from the panoply, and placing a Dazer and a mine.

Bottom of 1 – PlayerB
He moves Yojimbo and lands a smoke grenade. Then he moves the Rui Shi in order to remove the Dazer. A TO reveals and throws smoke, he’s Saito and kills the sniper. Then he retreats and hiddes behind a container. He finishes his turn putting into Supression Fire two Ryukens+Ruishi. Rui Shi also kills the maakrep from the distance

Turn 2
Top of 2 – PlayerA
I try killing his Keisotsu hacker through the Rui Shi’s repatear, but I am outside of hacking area for half an inch!

I want to remove the Rui Shi before it gets dangerous, so I send the Rodok HMG and try to get it outside Supression Fire range. To do so, I have to shoot outside cover, but it works and I completely remove it:

I move the unidron fireteam and place a couple more mines in order to stop Saito’s future run. Chasing him directly would have costed too many orders. And by doing this I’m closer to the enemy AC2.
Unfortunately, I do not estimate properly mine’s template length and my SpecOps triggers it after placing his last mine. I miss the armor roll and he dies.

At this point, I think the fireteam is no longer needed and I put the Umbra LT into suppression fire using his own order
Bottom of 2 – PlayerB
On his right side, he moves Yojimbo, placing a smoke template again.
While on his left, he moves Kuroshi and kills the spitfire unidron in two orders after putting it into Dogged.

He kills the FO unidron with Kuroshi while triggering a mine. It looks like a suicidal move, but it opens space for the FO bot to approach and remove the other two mines. Path is clear for Saito.

He moves the ML Keisotsu to the corner where he started the game.
He also tries to heal the broken Lu Duan with the spec ops but fails the wip roll and has no tokens because has been moving troops between groups and removed two orders at the beginning.
Turn 3
Top of 3 – PlayerA
At this point, I am currently winning because I have more objects from panoplies, but I still want to try to obtain more points, just in case. So I try to kill the ML Keisotsu with the Rodok HMG. If I succeed, I can try to reach the AC2 with the Umbra. Unfortunately, the ML crits my poor Rodok and I have to focus on defense instead.
I move the maligno a place a Dazer in order to slow down Yojimbo, but I die due to a Crazy Koala which was nearby. I move my right Ikadron in order to try to prevent Saito from advancing, and my left one in order to add an extra ARO piece.

Bottom of 3 – PlayerB
He decides he has to break my AC2 in order to win, so he tries it by moving Yojimbo. Unfortunately, his second movement leaves him in the open and dies because of the TR HMG.
Second attempt is done by Saito, throwing smoke and advancing. He has to throw smoke spending complete orders in order to avoid the Ikadron’s flamer.
In addition to that, as he has spent so many orders, he hast to do a move-move order or he won’t reach the AC2. That movement triggers the main and he’s not able to tank it. Phew, that was close!

Post Game Analysis
In the end, I won although I made some silly mistakes triggering mines without even dodging.
I decided to play more defensively placing mines instead of rushing crazily into the enemy’s AC2, but this was thanks to having obtained stuff from the panoplies earlier.
However, I have to be more careful because he could have won if he had had an extra order!